 Does anatomy have room on the yoga mat? Yes. Because the knowledge of physical orientation creates the basis for healthy exercise. To ensure that instructions such as “integrate your hip joint into the acetabulum” do not remain cryptic puzzles, we have tried to describe important anatomical basics in yoga as simply as possible. From head to toe.
We Europeans are a sedentary people. There is enough evidence for this: we sit in front of our desk, in front of the television, at the dining table… even while you are reading these lines you are sitting. Our movement potential lies on the ground and takes a nap. No wonder that many yoga beginners can no longer spread their toes or lift their arms at the beginning of their yoga career. The feeling for many parts of the body has been lost but can be rediscovered with yoga.
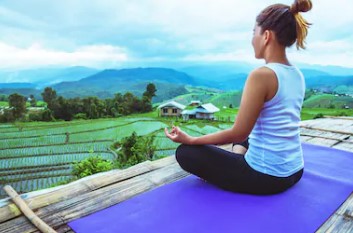
The Yoga journey to body awareness
Our body is like a three-dimensional map, which is to be discovered gradually. Yoga is the compass and shows the direction. So that one does not get lost on the way to more body consciousness, one should read the following signposts:
Ahimsa (Nonviolence): Everybody needs something different. Always be mindful and accept your limits. The asana practice can of course also be demanding at times, but excessive pressure, e.g. in the joints, is counterproductive.
Sthira-sukham asanam: Each asana should have two qualities: sthira (stability) and sukha (lightness). This is how you find the balance between tension and relaxation. The experience of lightness arises when the posture is taken correctly. Especially with powerful postures, many yogis plague themselves with stabilizing their body parts. With simple alignment principles, these positions are quite simple. It is about bundling the power and pulling it into the center – into the center of the body. In the second step, you send some more distance into the position. This gives the asana more lightness.
Direction: We humans differ from four-legged friends in that we walk through life in an upright position. Our basin is the center of it all. Our chest is centered above the pelvis and connects head (mind), heart (feeling) and abdomen (intuition). Whatever asana we’re in, we’ll straighten up first. Thus the individual body sections stand correctly to each other.
Yoga Tip 1 – Feet
To start most Yoga exercises, stand with both legs firmly on the ground. The alignment begins at the feet with every asana. If these are not correctly aligned, “errors” will also creep in on the upper floors. This is comparable to a building whose foundation is not built properly. In addition, the feet are decisive for the stability (see above Sthira-sukham asanam).
Who has understood the principle of Tadasana legs, can apply this in all further Asanas.
The feet are hip joint wide when standing upright (Attention: not hip joint wide, approx. one hand width space between the feet) and point parallel forward.
4 contact points: big toe ball, small toe ball, inside the heel, outside the heel
Tip 2 – Knee joint
The knee joint is a hinge joint. You can bend and stretch it, as well as rotate it slightly when angled. Make sure that the kneecaps always point straight forwards. In addition, in postures such as Virabhadrasana, the right angle between the ankle and knee joint is important. Another common mistake in this posture is that the knee tilts inwards. This leads to an unfavorable load on the menisci which should be avoided.
Tip 3 – Leg axis
The leg axis is the interaction of foot, lower leg, thigh, and hip joint. This unit plays a particularly important role in standing positions, as the leg acts as a shock absorber and is used for power transmission. In addition, X- and O-legs can be balanced by the correct alignment of the leg axis:
The outer edge of the X-leg should be subjected to greater stress, while O-legs does exactly the opposite and puts more pressure on the inner edge of the foot.
It depends on the right breathing technique
 The most important prerequisite is focusing on the breath. In yoga, one breathes in and out exclusively through the nose. The aim is to achieve a calm, stable breath and to breathe into the individual asanas (exercises). The concentrated, even breath should help to relax body and mind despite strenuous postures. The enhancement of this is the meditative Ujjayi breath (victorious breath), which sounds like the sound of the sea since the epiglottis is slightly closed during inhalation and exhalation. For beginners, however, quiet breathing through the nose is sufficient at first. Should the breath stall in between, this is usually a sign of tension and it is precisely this that must be released with the help of the breath.
Tip 4 – Arm axis
The shoulder, hand and elbow joints, as well as the hand, forearm and upper arm, belong to the arm axis. It is essential that the elbow always follows the movement impulses from the hand and shoulder. The hands are placed shoulder-wide on the yoga mat, the middle finger points forward at right angles to the mat and forms, so to speak, the extension of the forearm.
This reduces the strain on the wrists. The fingers are fanned out thereby beautifully wide. To activate the arch of the hand, apply some pressure to the ball of your thumb, small finger, and fingertips. Getting the pounds rolling requires a little more than just fitness.
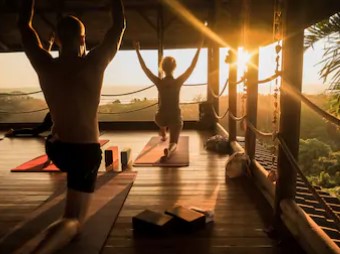
Different Styles of Yoga
There is a great variety of different types of yoga. Bikram Yoga, for example, takes place at sauna-like temperatures of around 40 degrees and is extremely demanding and sweat-inducing. For those who prefer a quieter pace, Hatha Yoga is the best choice, and for those who prefer a dynamic flow, Power Yoga is a good choice. So before you decide on a course or studio, it makes sense to find out beforehand what kind of yoga is practiced there and to ask yourself what you most expect from yoga.
Tip 5 – Shoulders
Our shoulders are a barometer for our mood. The proverb “Don’t hang your shoulders” should also be taken to heart on the yoga mat. Because if you let your shoulders sink back and down, you give your heart expression.
The optimal positioning of the shoulder girdle is achieved by bending the elbows, turning the upper arms strongly outwards and stretching the shoulders broadly from the clavicles. The picture of squeezing out lemons under the armpits is helpful here. With this alignment tip, the arm axes are screwed together spirally and the danger of overstretching elbows is minimized.